Sticky elements stick to the top of the browser window (with or without an offset) as the user scrolls down the page.
Sticky elements differ from “fixed” position elements in that they’re statically positioned until they interact with the top of the browser window. They also will lose their stickiness when they reach the end of their parent container.
You can make any element sticky in ACSS with a single class: .sticky
After making an element sticky, you probably also want to control its offset. The offset is the gap between the top of the browser window and the top of the sticky element. The default offset in ACSS is “0,” which means the element will touch the top of the browser window if you don’t choose a different offset value.
There are three ways to control sticky offset behavior in ACSS.
Automatic Sticky Offsets in Automatic.css
Automatic sticky offset is the best practice behavior in ACSS because it gives you global control over the offset value of all your sticky elements, which is usually the desired outcome. It also allows you to create sticky elements with one class instead of two.
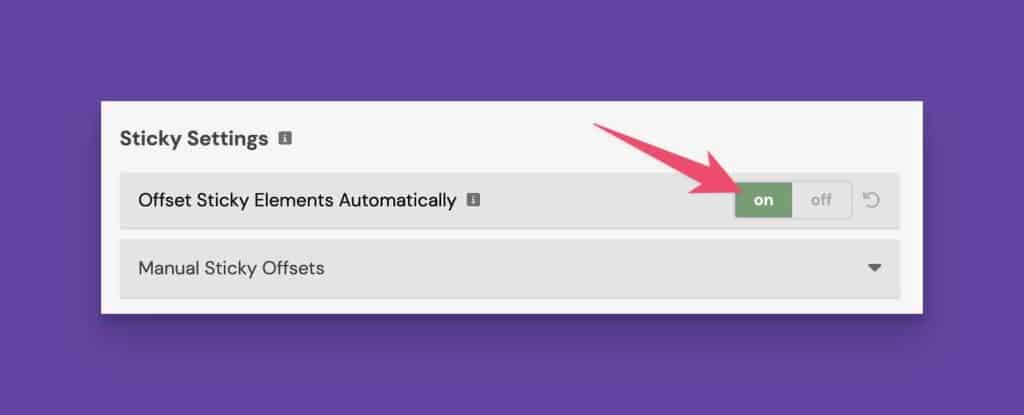
In the ACSS dashboard, click on “Additional Styling.” Scroll down until you see Sticky Settings and make sure you turn on “Offset Sticky Elements Automatically.”
Next, find the Scroll Styling controls in the same tab. These controls are designed for “scroll to hashlink” functionality but also control automatic sticky offset values because scroll-to-hash and sticky functionality both need the same type of offset for best usability.
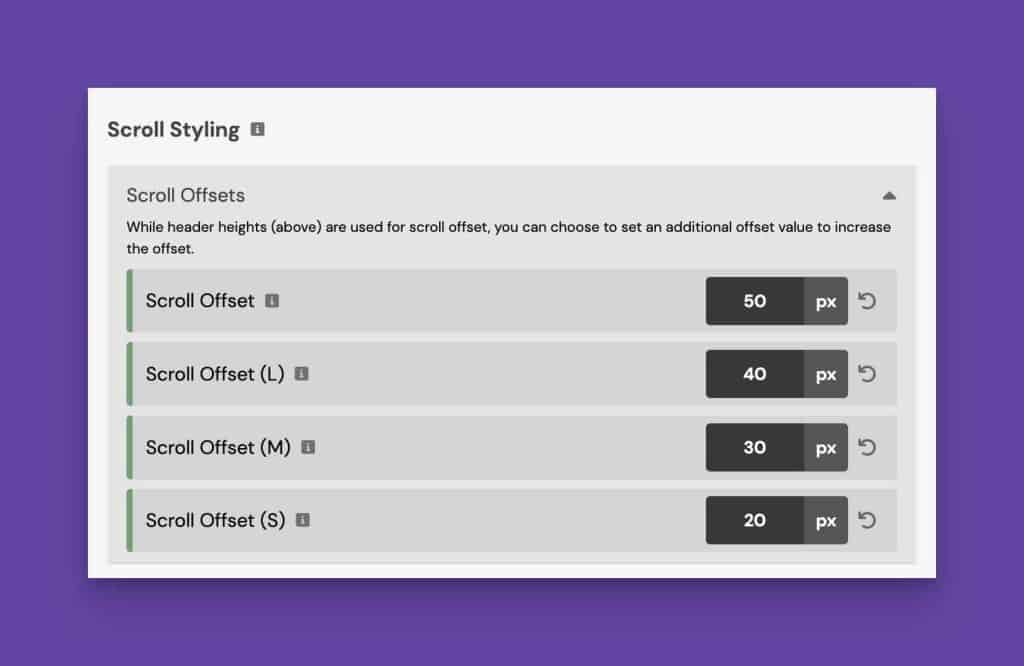
The value you put in the scroll offset box will be the offset for all your sticky elements. You can define an offset at each breakpoint to ensure your offsets are responsive.
All you have to do is put the .sticky class on any element and your offset is automatically taken care of. You can adjust the offset value anytime, and all your sticky elements will update accordingly.
Manual Sticky Offsets With Utility Classes
If you don’t use automatic offsets as detailed above, you’ll want to use the sticky offset modifier classes on your sticky elements.
There are three modifier classes to choose from:
sticky-top--ssticky-top--msticky-top--l
They’re called “sticky-top” because, with sticky elements, you must define a “top” value (the space away from the top of the viewport). The extensions stand for “small,” “medium,” and “large.”
These three modifier classes are customizable from the Sticky Settings panel in “Additional Styling.” Just open the “Manual Sticky Offsets” accordion.
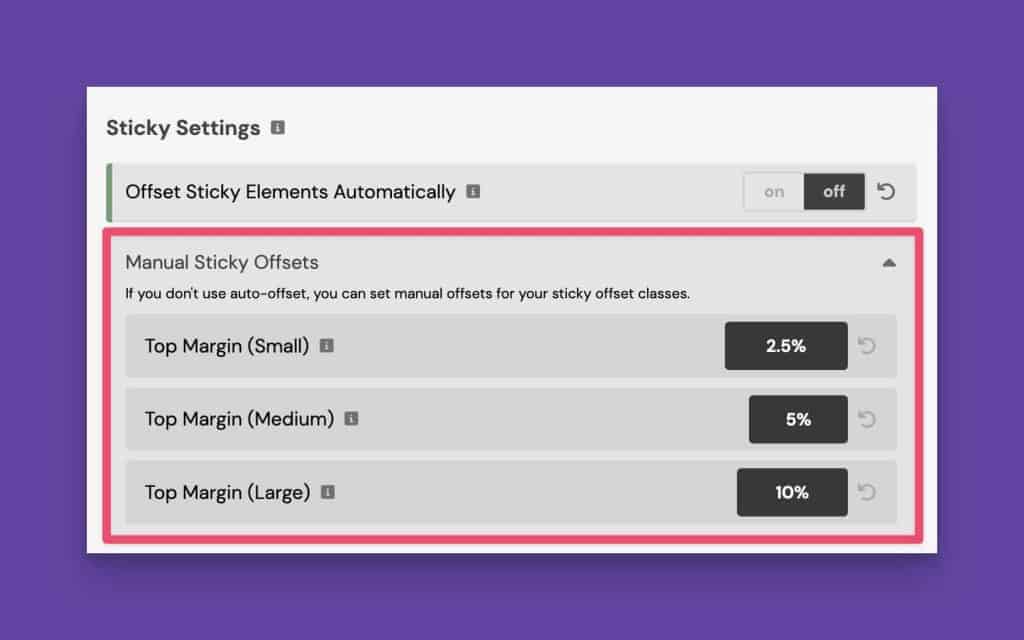
By default, these values are expressed as percentages, but you can use any valid CSS measurement unit.
Note: You can still use these when “Offset Sticky Elements Automatically” is turned on. They’ll override your automatic offset value, giving you one-off control of certain sticky elements.
Manual Sticky Offsets With Custom Classes or ID Styling
You can make your own sticky offset class or change the offset of any element at the ID level. Once you’ve added the .sticky class to an element, manually set its “top” value in the page builder or with custom CSS.
#element {
top: 3em;
}
Code language: CSS (css)Remember that while this is possible, it’s probably not practical.
If you style an element with a custom class, then you should probably just add the sticky behavior yourself.