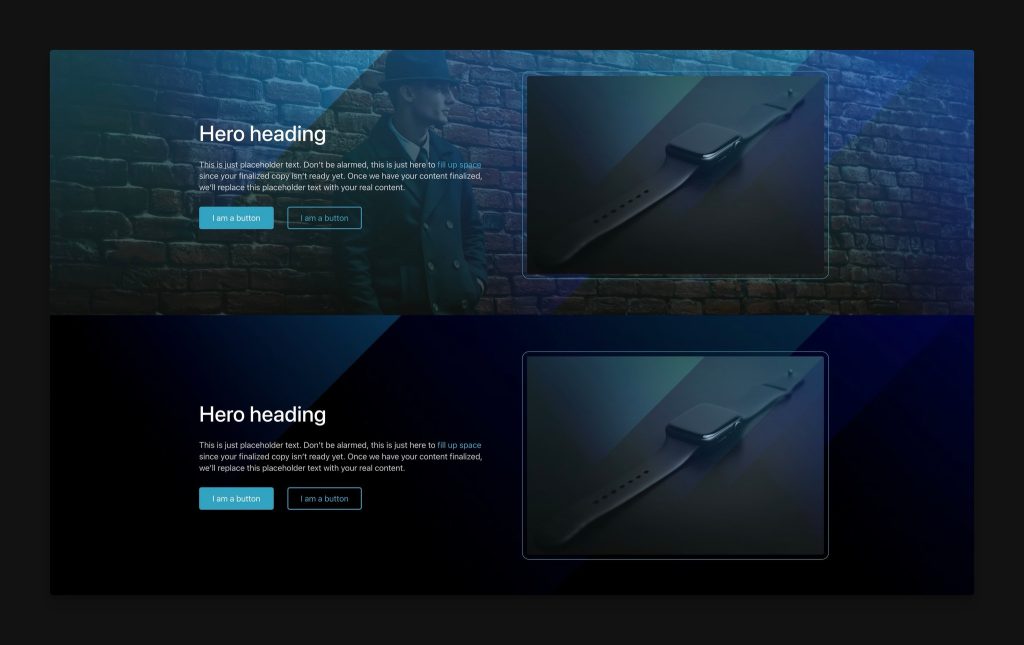
Users can create custom textures and overlays in Automatic.css using a unique approach that allows for a texture to be used as a background, overlay, or both.

What are textures?
Web designers are typically working with solid colors, or they’re working with image files and gradients for backgrounds and overlays. Often, it’s a mix of both.
ACSS has provided tons of solid background and overlay options since inception, but you still need a way to define areas of “texture.” In Automatic.css, a Texture is any background or overlay that requires a re-usable image file, repeating pattern, or gradient.
By creating a texture that’s available globally, you can easily apply your texture to select areas of your site using a simple utility class.
Activating Textures & Overlays
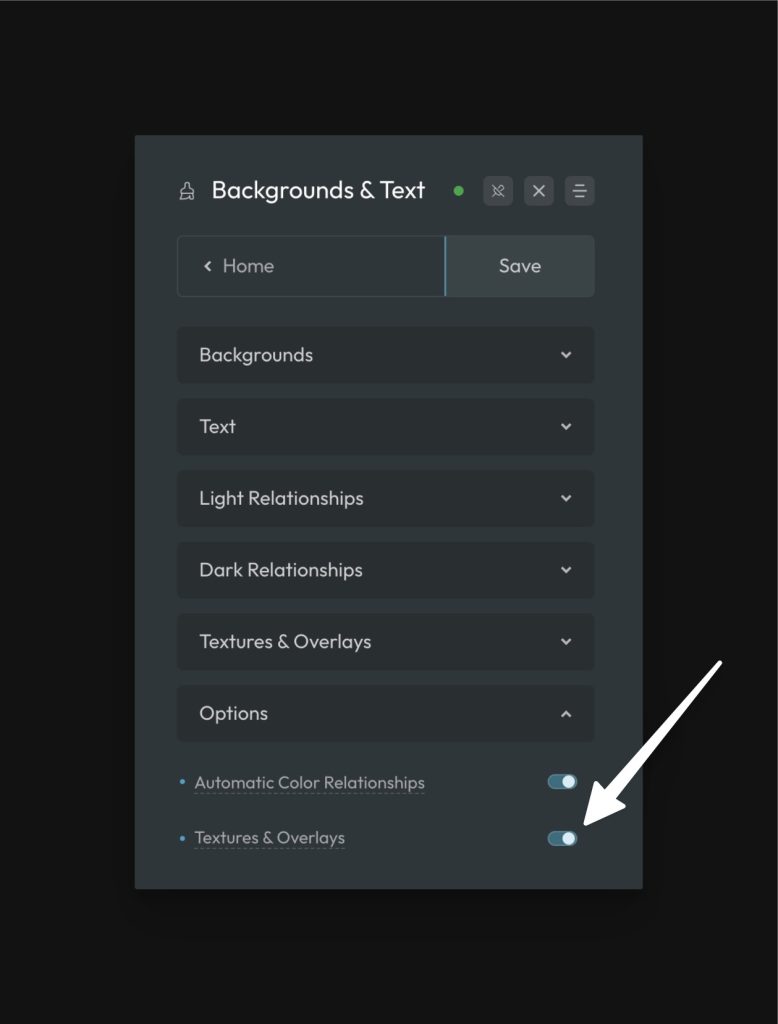
To create custom textures, you first need to activate the Textures & Overlays feature by navigating to Backgrounds & Text > Options > Textures & Overlays:

Once you enable this option, a new “Textures & Overlays” accordion will appear above Options.
Creating Your First Texture

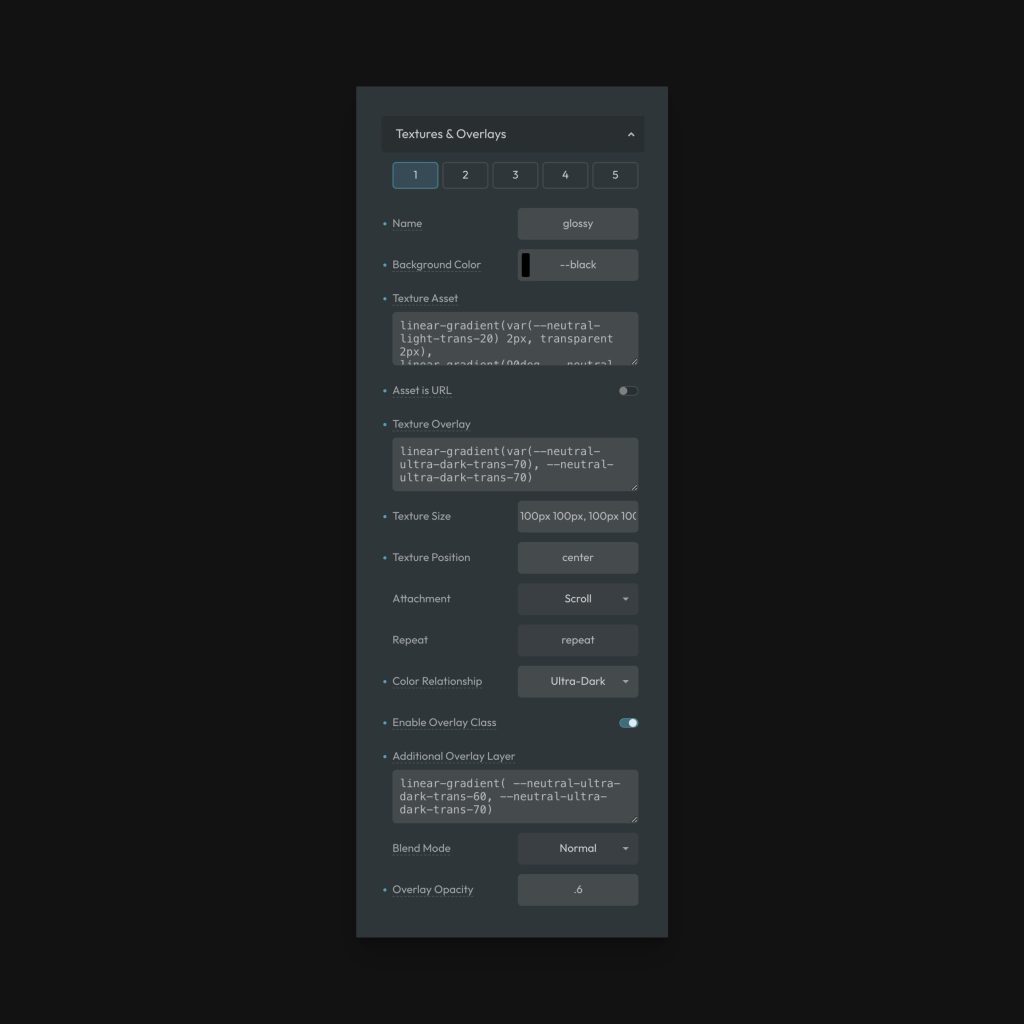
The Textures & Overlays panel can be a bit intimidating at first glance. Don’t worry, though, it’s fairly easy to dial in the exact effect you’re going for.
Here is an explanation of each property:
- Name: (Optional) A custom name for your texture. This will generate extra utility classes:
.texture-[name]and.overlay-[name]. By default, you’ll have.texture-1and.overlay-1and these options will always be available to you even if you opt for a custom name (assuming the overlay option is enabled on the texture for.overlay-classes). - Background Color: Background color is rarely seen when using textures and overlays unless your Texture Asset is transparent or the Texture Asset fails to load (background color is used as a fallback). Set this to generally match the color of your texture/effect.
- Texture Asset: The file or gradient for your texture. And yes, this field supports compound assets. If your texture is file-based, using the raw, relative URL is recommended.
- Asset is URL: If your asset is a url, enable this option. We’ll automatically wrap your asset in
url(). - Texture Overlay: You can add a local overlay color or gradient to your texture, but it must be done with a
linear-gradient()because we use a new border-image technique which doesn’t require pseudo elements. If you want a solid overlay, just make the two gradient values the same. - Texture Size: The dimensions of the asset. Accepts any valid background-size value.
- Texture Position: The position of the texture within its box. Accepts keywords, static values, and relative values.
- Attachment: Choose whether the texture should behave normally (
scroll) or act as parallax (fixed). - Repeat: Choose to have your pattern
repeatorno-repeat. Other repeat-related keywords are applicable as well. - Color Relationship: Textures are compatible with ACSS auto color relationships, allowing you to sync foreground styles wherever your texture is used.
- Enable Overlay Class: If you want to be able to use your texture as a pseudo-element overlay in addition to the background effect, enable this option.
- Additional Overlay Layer: Your overlay can have an overlay! This uses the same border-image technique from above, so make sure you use a
linear-gradient(). - Blend Mode: Set a blend mode for your overlay (optional).
- Overlay Opacity: Set an opacity for your overlay.
Using Your Texture
If you want to use your texture as a background effect, add the .texture-[name/number] utility class to any area you want to see your texture in the background.
If you want to use your texture as an overlay effect, add the .overlay-[name/number] utility class to any areas you want to see your texture in overlay.
Note: The .overlay- classes will also work on images as long as your image is wrapped in a figure or picture tag.
Tweaking Textures on The Fly (Texture Variables)
Textures and Overlays use variables that can be overwritten at any time at the page level, template level, or box level. This allows you to start with your global texture while easily making any tweaks and adjustments in specific areas.
Here are the target variables that can have new values assigned at any time. We recommend tweaking this with your own modifier classes (.texture-[name]--[modifier]) or at the ID level if it’s a true one-off tweak:
For Background Textures
--texture-background-color--texture-asset--texture-position--texture-attachment--texture-repeat--texture-size--texture-overlay
For Overlay Textures
--overlay-background--background-position--texture-repeat--texture-size--texture-overlay(the local overlay vialinear-gradient())--blend-mode--overlay-opacity
Quirks & Workarounds
As with everything in CSS, the techniques used to achieve one effect can create roadblocks for other effects. This is especially true with something as complex as background textures and overlays.
As long as you know about the quirks, you can work around them. Here are some things to be aware of:
- If you are using the local overlay effect for Textures with the
.texture-classes, you won’t be able to use the border property. This is because the local overlay usesborder-imageto accomplish the overlay (to avoid the use of pseudo elements and additional complexity). If you must be able to put borders on the same box as your texture, you need to make sure you’ve enabled the Overlay Mode option and configure your overlay to look exactly like your background texture. Overlay mode uses a pseudo element and will free up the border property on your original box. - For overlays, if the element you’re wanting to add an overlay to already uses pseudo elements for something else, you won’t be able to add your overlay effect (or it’ll replace the existing pseudo element). This is because elements can only have a single
::beforeand a single::after. You can get around this by adding an additional wrapper to your structure, will give you two additional pseudo elements.
Textures & Overlays is a very powerful feature in Automatic.css and is implemented in a uniquely exceptional way that allows for textures to be used as either backgrounds or overlays while mapping to auto color relationships. No other framework in existence has the feature. Enjoy.