Automatic.css officially supports Cwicly as of version 2.7. Please follow the instructions below for proper setup.
Step 1: Install Cwicly
For a smooth setup process, install Cwicly before you install Automatic.css. Cwicly needs to exist when ACSS is activated so that ACSS can check for the existence of Cwicly, pre-load utility classes, and automatically activate various aspects of the framework.
Official Cwicly setup instructions
Step 2: Install Automatic.css
Download and install the latest version of Automatic.css from your account dashboard. Remember, you need v2.7 at minimum.
Step 3: Turn on ACSS Support for Gutenberg
Cwicly is a Gutenberg-based builder, so we need to make sure ACSS Gutenberg support is activated.
Head over to the Options tab in ACSS and turn on Gutenberg support. Ensure all settings in the Gutenberg area are set to “On” except for “Class-First Workflow.”
By default, Cwicly has a class-first workflow, so we need this setting off.
Step 4: Configure Cwicly Admin Settings
In the WordPress admin, go to Cwicly > Settings and open the “Advanced Settings” panel.
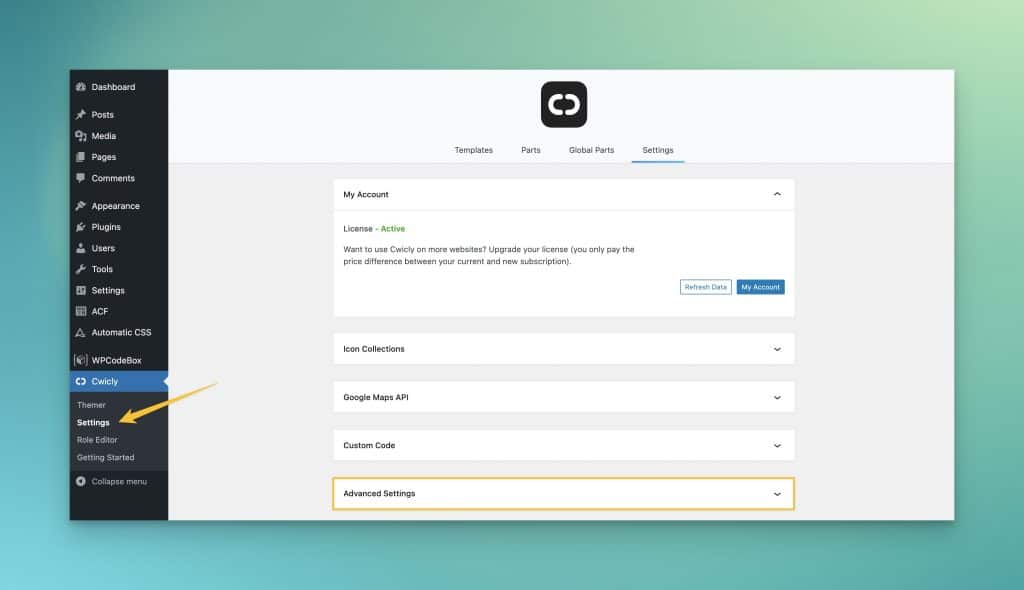
Here are the recommended settings to confirm:
- Remove List Container = On
- Remove Classes & IDs = On
- Cwicly Defaults = Off
- Remove SVG Filters = On
- Remove WordPress Global Styles = On
- Remove WordPress Emojis = On
- Remove Gutenberg Template Part Wrapper = On
- Remove Container Block Display Properties = Off
- All Deprecated Settings = Off
Step 4: Configure Cwicly Builder Settings & Global Styles
Open Cwicly by editing a page. Once the builder loads, navigate to the Settings Panel:
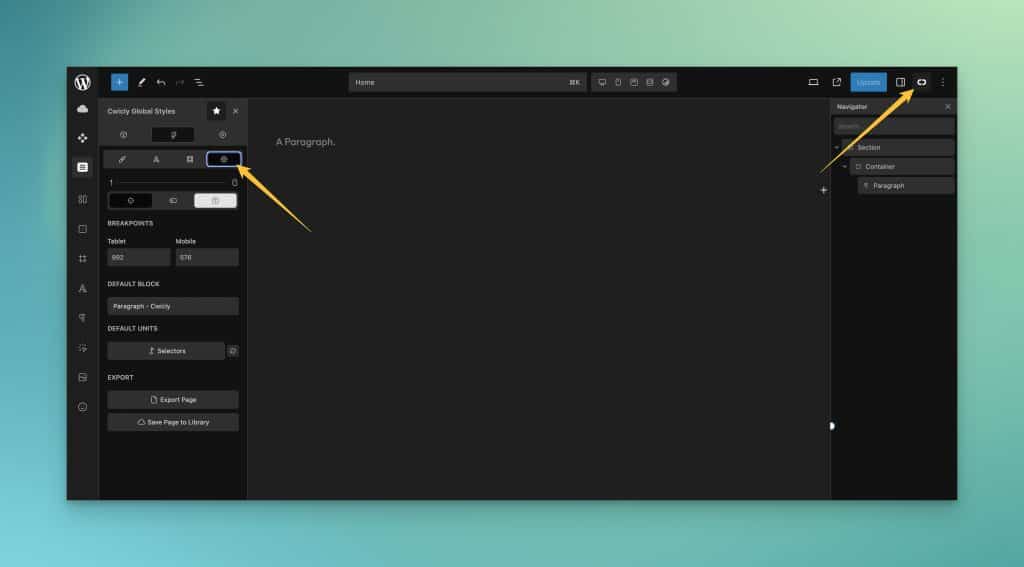
Breakpoint Setup
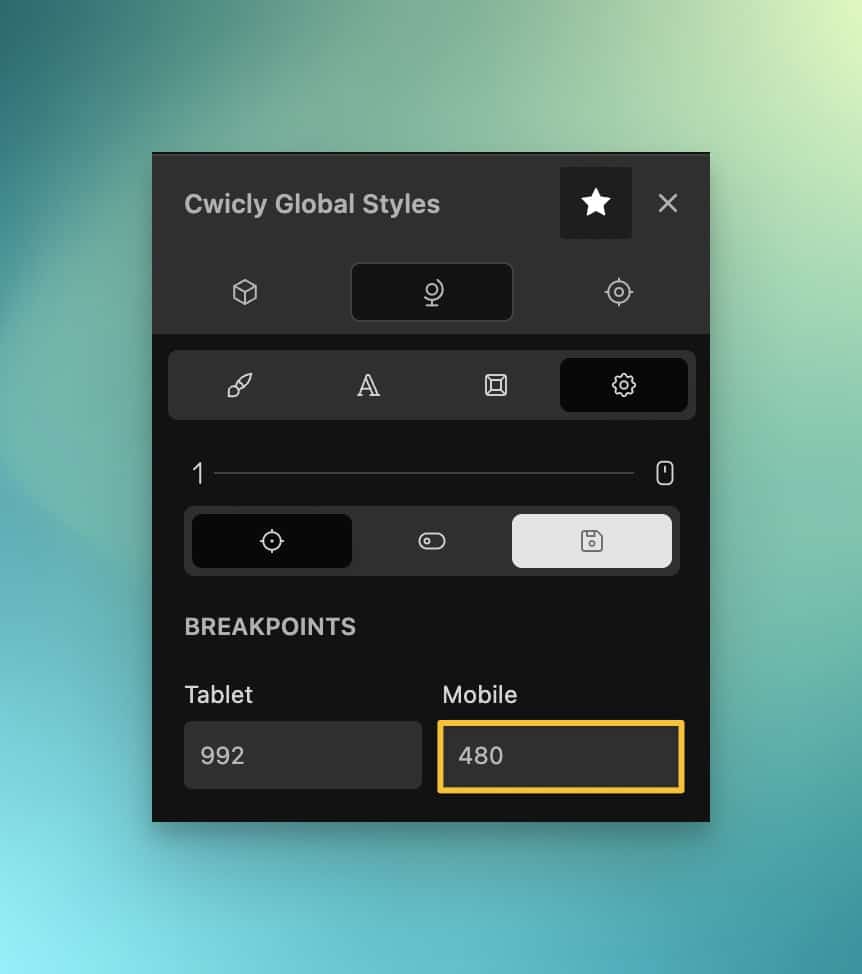
Cwicly and Automatic.css must use matching breakpoint values. The actual values are up to you as long as they are identical between Automatic.css and Cwicly.
One challenge with Cwicly is the lack of additional breakpoints. Automatic.css has four breakpoints by default, with support for up to six breakpoints. Cwicly only has two breakpoints.
By default, the “Tablet” breakpoint in Cwicly matches the “L” breakpoint in Automatic.css with a value of 992px, so you don’t have to change that one if you don’t want to.
The “Mobile” breakpoint in Cwicly (576px) doesn’t match any ACSS breakpoints by default, so we must adjust this. In our experience, 576px is too wide to get a good feel for how your site will render on most phones. We recommend changing this breakpoint value to match ACSS’s “S” breakpoint (480px).
Backend Setup
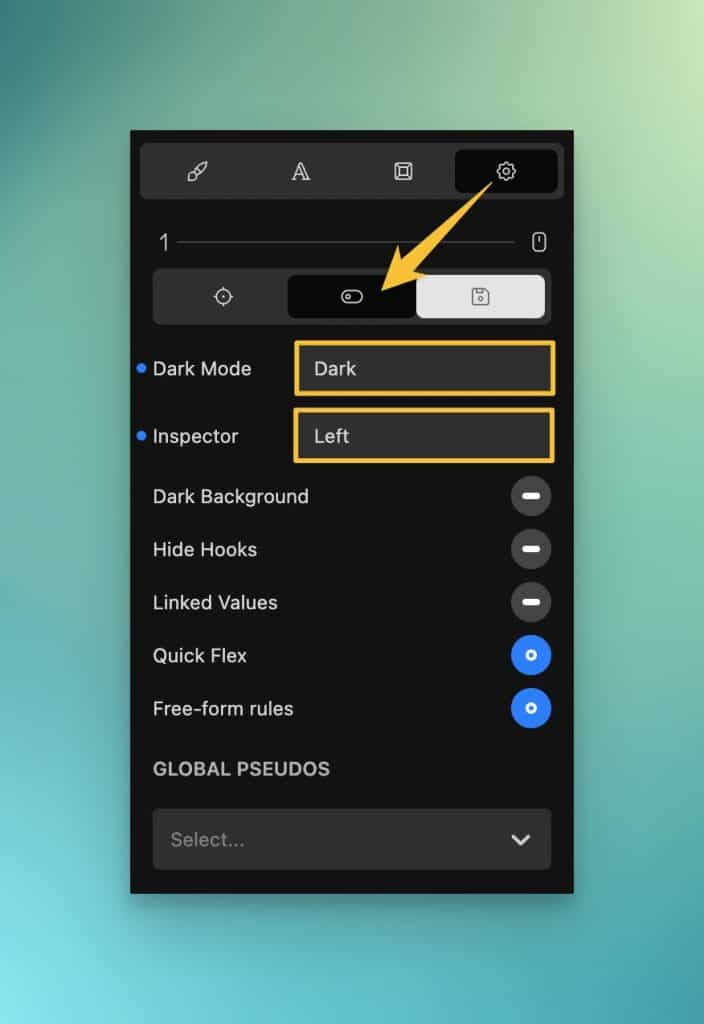
This is not required for ACSS, but we recommend clicking on the “Backend” icon (the one in the middle) and then setting Dark Mode to “Dark” and “Inspector” to “Left” (optional).
Setting the Inspector to the left will give you a more traditional page builder experience, though many Cwicly users prefer the inspector stay on the right since that’s where the block inspector is natively in Gutenberg.
Font Setup
Next, navigate to the Typography Settings area by clicking the “A” icon.
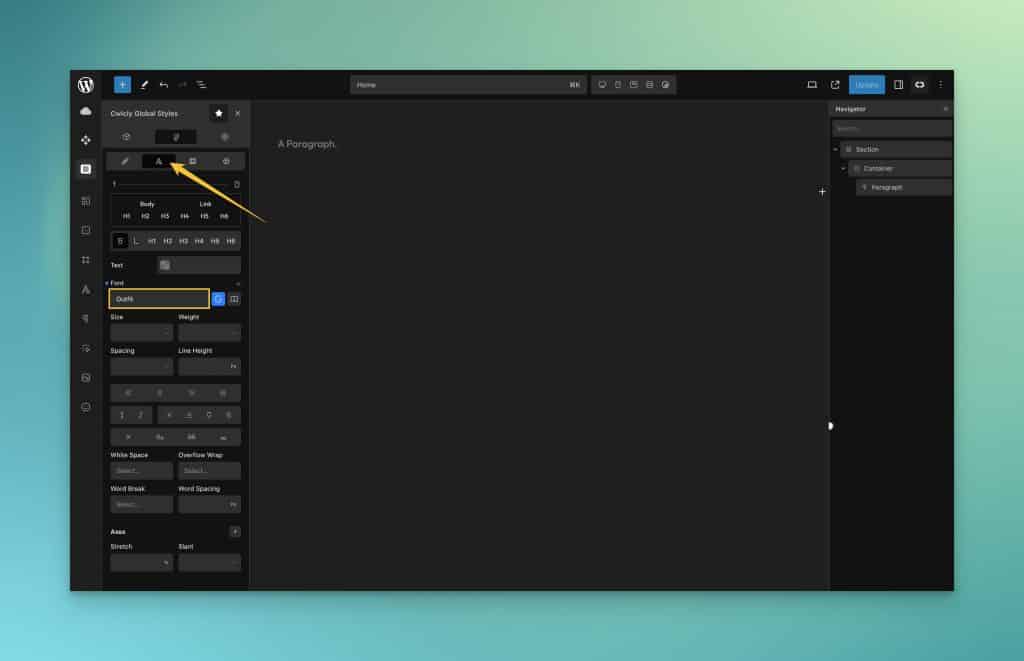
Set your preferred font family for Body and Headings. We recommend making sure all other inputs here are unset. Automatic.css will handle all text sizing, line height, etc. for body text and headings.
Default Element Behavior
Cwicly allows you to set some default styling on certain elements. We recommend you set default styling on two elements in particular – the Section element and the Container element.
Navigate to the Elements Global Styles panel by clicking the 3D box icon. Then click the “Section” icon in the middle.
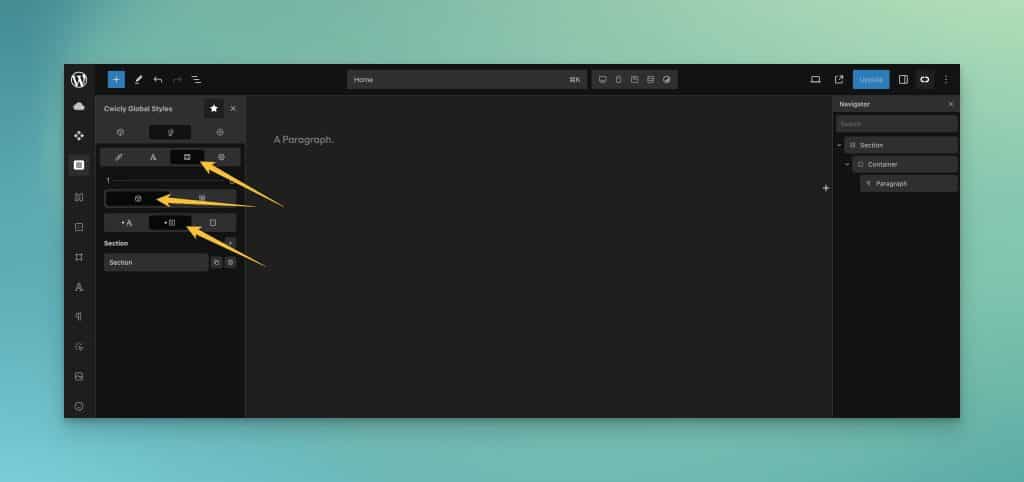
If this area is blank, click the “+” icon to add a new element.
Add global styles for a Section element and click on it to open the styles panel. Once the styles panel is open, click the “Layout” icon.
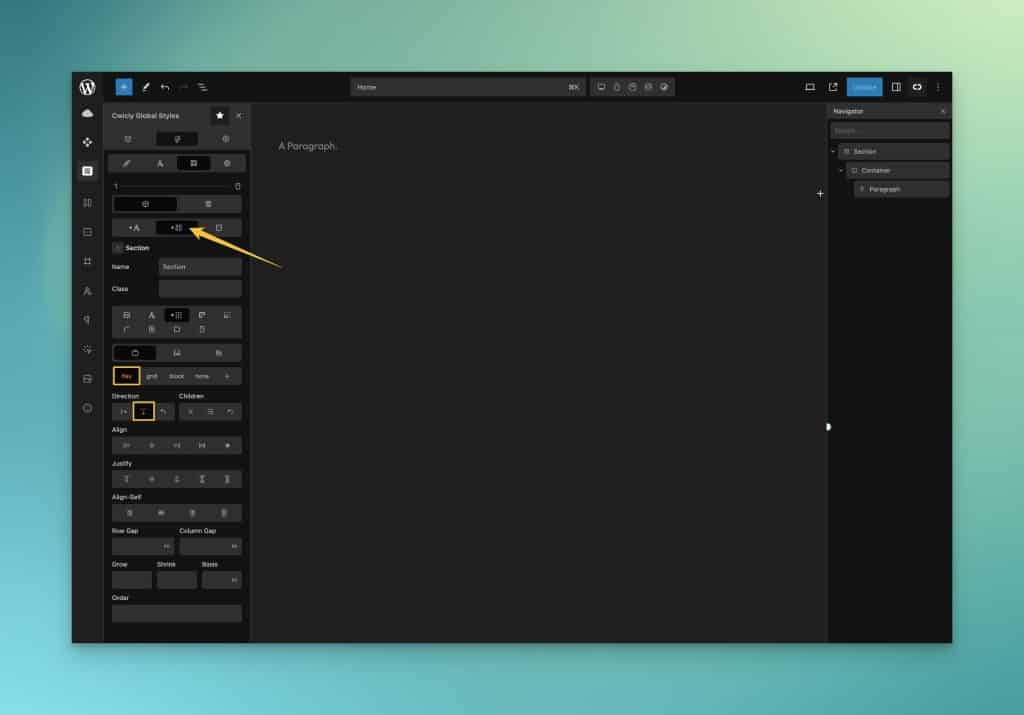
Set the default display property to “Flex” and the default flex-direction to “Column.” This will make it easier to use the --container-gap variable to space out your section’s inner containers.
Next, click the icon for the “Container” element.
Again, if this area is blank, click the “+” to add new global styles rules.
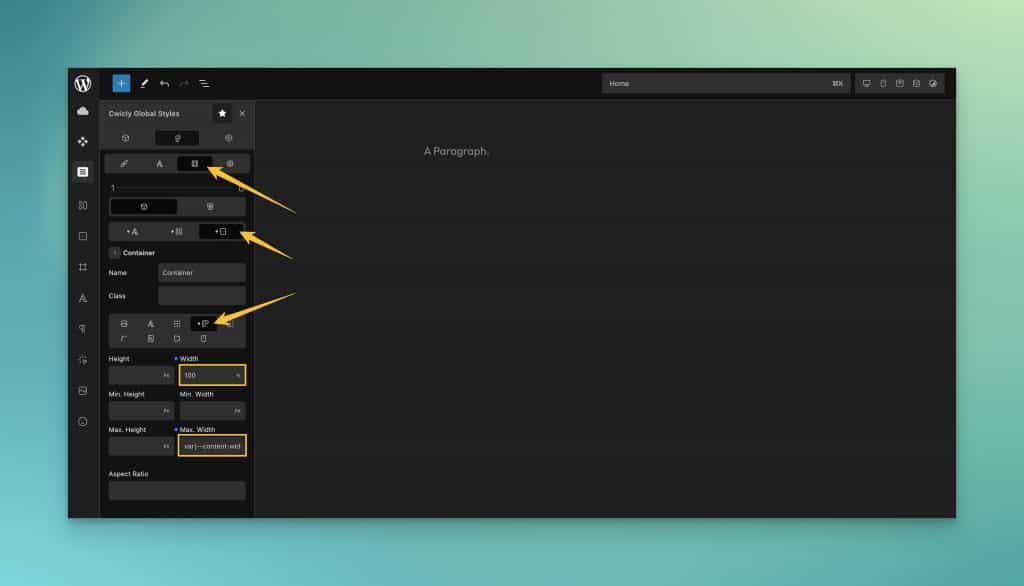
With the styles panel for Container open, click the Sizing icon.
Set the width to “100%” and the max-width to var(--content-width).
This will sync your containers to the website width you set in Automatic.css.
Optional: Cwicly Support for Posts & CPTs
By default, we don’t load styles in the builder on posts or custom post types. This is due to the limitations of Gutenberg to know what type of content you’re creating (an actual post or a page layout).
Support for posts and CPTs exists, though, you just have to add it manually. Open your functions.php file and add the following:
add_filter(
    'acss/gutenberg/allowed_post_types',
    function( $post_types ) {
        return array_merge( $post_types, array( 'post' ) ); // Add your post types in the array().
    }
);
Code language: PHP (php)
This allows you to add support for posts/CPTs selectively.
We hope to improve this experience in the future.
You’re all set!
ACSS and Cwicly are now ready to work together. You can proceed with the rest of ACSS setup or begin building your site!